Latch hooking is an imaginative craft that kids can easily learn and enjoy. It involves using a tool called a latch hook to pull yarn through a canvas creating patterns and designs.
Not only does latch hooking help children develop their motor skills and hand eye coordination but it also allows them to express their creativity by making stunning pieces of art.
If you’re interested in trying out latch hooking this beginners guide will provide you with step by step instructions to help you become skilled at this craft.
Getting started with latch hooking is an artistic activity that children can quickly grasp and have lots of fun doing.
This craft involves creating patterns and designs by pulling yarn through a canvas using a tool known as a latch hook.
If you’re excited about exploring the world of latch hooking this beginners guide will take you through each step ensuring that you become proficient in this craft.So lets get started with how to do latch hooking.
Step 1: Get Everything You Need
The thing you should do when starting a latch hook project is gather all the materials required. Below is a checklist of what you’ll need;
Latch hook canvas: This special kind of canvas has a grid pattern. Is usually made from burlap or another strong material. It serves as the foundation for your latch hook project.
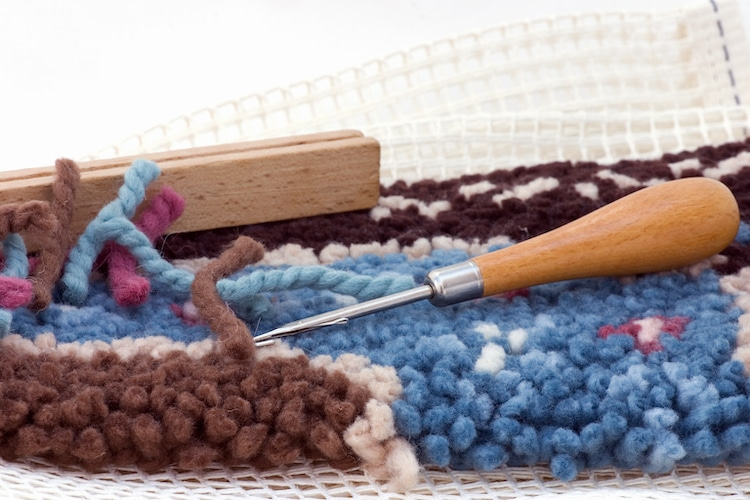
Latch hook tool: The latch hook tool resembles a small crochet hook with a handle. Its purpose is to pull yarn through the holes in the canvas and create loops.
Yarn: Select yarn in colors and thicknesses that suit your preferences for the project. It’s important to choose yarn for latch hooking as some types may be too slippery or difficult to work with.
Scissors: A sharp pair of scissors will be necessary to trim the yarn once it has been looped through the canvas.
Pattern or design: Decide on the pattern. Design you want to create using the latch hook technique. You can find latch hook patterns in books. Even create your own.
If you wish to hang your completed latch hook project you might consider using a latch hook rug binding or rug frame to secure the edges.
Latch hooking requires patience and creativity. It can be an enjoyable craft allowing you to express your creativity while embracing the process.
Step 2: Get the Canvas Ready
Before starting your latch hook project make sure to prepare the canvas. Begin by cutting the canvas to your desired size.
You have the freedom to create projects of sizes based on your preference. Once you’ve prepared the canvas you’ll notice that it features a grid pattern where each square represents where you’ll insert the yarn on.
Step 3: Select a Design
Next choose a design for your latch hook project. You can. Opt for made designs available, in latch hook kits or create your own unique design.
If you’re new to latch hooking it’s advisable to start with a design that incorporates colors and gradually progress towards more intricate patterns.
Step 4: Get Your Yarn Ready
Now it’s time to get your yarn ready.Start by cutting the yarn into pieces 3-4 inches long depending on the desired length of the pile. You have the option to use a color or multiple colors depending on your chosen design.
Next take your latch hook tool. Insert it into the square of the canvas. Hold onto the yarn securely with your hand. With the latch hook tool catch the yarn.
Pull it through the square so that the hook goes under the canvas and comes up on the side. Remember to ensure that you close the latch when inserting the hook and open it when pulling through the yarn.
Here are some helpful tips and techniques to remember when engaging in latch hooking;
1. Select the materials: Ensure that you have the latch hook tool and high quality yarn or fabric strips. This will guarantee an end result that will withstand the test of time.
2. Begin with projects: If you’re new to latch hooking it’s advisable to start with projects. This allows you to familiarize yourself with the technique before tackling more designs.
3. Follow the provided pattern: Most latch hook kits include a pattern, for guidance. Take the time to carefully read and comprehend the instructions before starting your project. Pay attention to any color changes or special stitches that may be involved.
4. Exercise patience: Latch hooking can be a time consuming activity so it’s important to be patient and take your time. Rushing through the process may result in mistakes and an imperfect final product.
5. Maintain a workspace: Keep your yarn or fabric strips neatly organized in your work area making it easy for you to locate colors when needed. This will also help prevent any tangles or knots from occurring.
6. Consider using a backing material: To ensure the security and prevent unraveling of your latch hook project it’s an idea to utilize a backing material such as fabric or a latch hook canvas designed specifically for this purpose.
7. Maintain tension: The key to latch hooking lies in achieving the right tension. Ensure that your yarn or fabric strips are pulled tight to create a latch while avoiding excessive tightness that could distort the design.
8. Take breaks when necessary: Latch hooking can be repetitive. Put strain on your eyes and hands. It’s important to take breaks to rest and relax, preventing fatigue and allowing you to enjoy the process fully.
9. Give it a touch: Once you’ve completed your latch hook project add a touch by finishing the edges with binding tape or sewing, on a fabric border. This will not give it an appearance but also protect the edges from fraying.
10. Embrace Enjoyment: Latch hooking is an art form that allows for creativity and versatility. Don’t hesitate to explore yarn colors, textures. Even combine latch hooking with other techniques. Importantly have fun while creating something unique and beautiful.